Monday, December 21, 2020

Merry & Bright - SID

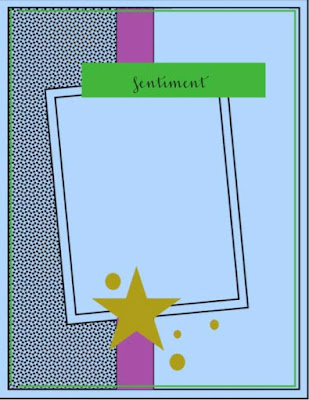
   Welcome and Merry Christmas to all. This month's reveal of Stick It Down card sketch. When I say this month's sketch it screamed Christmas card. I changed it up a bit by moving the sentiment spot to the center. 
I kept it fairly simple by just using plain cardstock.  
Supplies: cardstock (Cardstock Warehouse), sequins (SpiegleMom Scraps), die (Crafter's Companion) die-cut (My Mind's Eye), wax (Crafter's Companion)
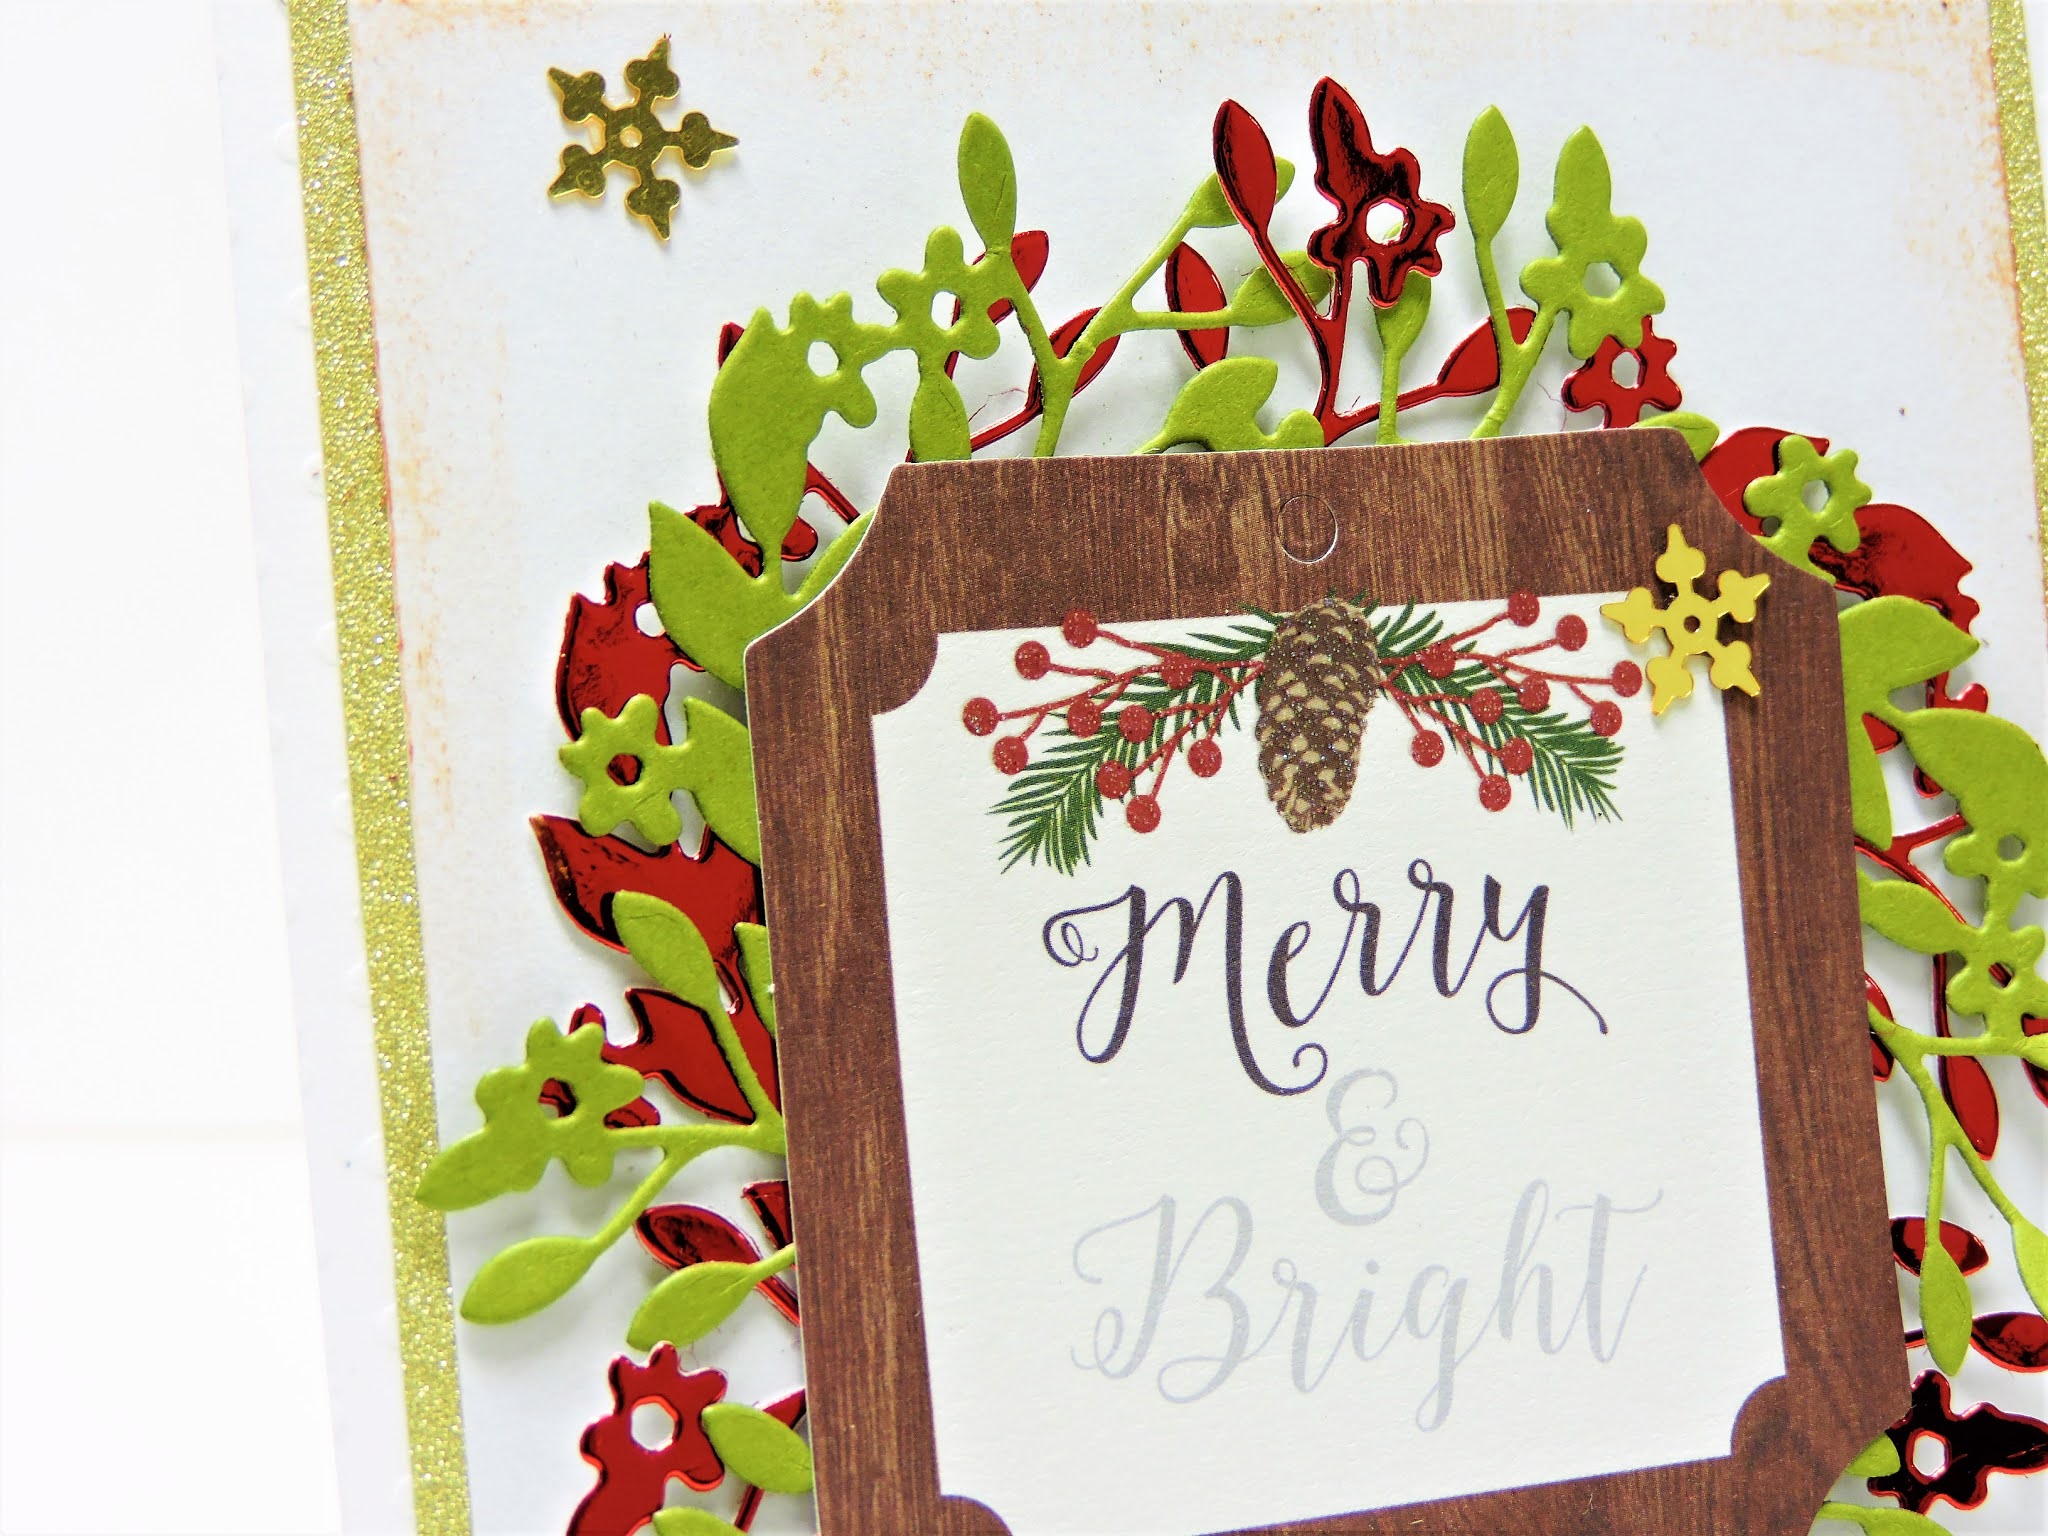
   Here is a closer look. The white cardstock has a pearl finish which I aged the edged with a gilding wax. 

   As you can see plain cardstocks can make really elegant cards. I love the snowflake scatter.
You have until the end of the month to play along with any - or all! - of our sketch challenges. Just post a link to your creation on Stick It Down blog's sidebar. If you share on social media, be sure to tag #StickItDown.

  One randomly selected winner will receive a prize! We'll also choose one winner from each sketch to be a guest designer!

Monday, November 23, 2020

It's The Most .... - SID

    Can believe it is already mid-November?  You know what that means it is time for Stick It Down card sketch reveal. 

   With this sketch, the heart dangles inspired be to create a Christmas card. 
Supplies: cardstock (Cardstock Warehouse), embossing folder (Echo Park Paper Co.), sequins (SpiegelMim Scraps), sticker (My Mind's Eye), ink (Altenew)

   The banner was a sticker that I backed with cardstock to turn it into a die-cut. I then used foam adhesive to attach it. 

   I love how the glitter cardstock makes this simple card are eye grabber. 
You have until the end of the month to play along with any - or all! - of our sketch challenges. Just post a link to your creation at Stick It Down blog in the sidebar. If you share on social media, be sure to tag #StickItDown.


Monday, October 19, 2020

A Spooky Card - SID

 Today I will share with you my take on this month's card sketch from the Stick It Down blog.  I don't typically do Halloween cards but for some reason this sketch made me think of Halloween. 


   As you can tell, I followed the sketch 

Supplies: pattern paper (Authentique) cardstock (Cardstock Warehouse), sequins (SpiegleMom Scraps washi tape (The Paper Studio), sticker (Authentique), and die cuts (7 Gypsies)

   The moon image and "October 31st" was a journaling card that I cut the bottom off (October 31st), matted it, and moved it to the top of the moon. 

   I also, couldn't resist adding a little sparkle to the card so I went with purple sequins and stars.

You have until the end of the month to play along with any - or all! - of our sketch challenges. Just post a link to your creation in our sidebar. If you share on social media, be sure to tag #StickItDown.

  One randomly selected winner will receive a prize! We'll also choose one winner from each sketch to be a guest designer!

Saturday, October 10, 2020

Birthday Wishes

    At the moment I am in love with the slimline card trend. I don't know why but this is my third card this week that I created in that style. The card I am sharing with you tonight is based on the Sketch~N~Scrap WCMD #2 sketch. 

   Here is my take on the card. Sorry for the bad photos lighting in my studio is bad and I didn't want to go downstairs and set up the photo board. 
Supplies: cardstock (Paper Studio and Cardstock Warehouse), pattern paper (Heidi Swapp and Simple Stories), brad (Terresa Collins), ribbon (?), stickers (Heidi Swapp), manual dies (Crafter's Companion), and electronic die cutter (Silhouette America) 

The sentiment was die cut from wood paper. I love how it looks on the rose gold mirror paper by Cardstock Warehouse. 

   I love this bias ribbon that I had in my stash. It goes so well with the two collections that I used on this card. 
 
   The cut file that I used is free from Scrapbook & Cards Today. 


Tuesday, October 6, 2020

One Stamp Three Ways

   Here are three cards that I created for the Scrapbook & Cards Today blog challenge "1 Stamps 3 ways". The stamp I used was the pinecone background stamp by Simon Says Stamp. 
I ended up creating a Christmas card, thank you card, and a birthday card all using the stamp as my base image. 


   For this Christmas card, I kept it really simple. I heat embossed the background stamp image in a nice cranberry embossing powder. To finish the card I matted a journaling card and adhere it to the card. 
Supplies: cardstock (Paper Studio and Cardstock Warehouse), journaling card (Graphic 45), embossing powder (?)

Up next, is the thank you card. I first stamped the image on kraft cardstock and mounted that to the card front. I then stamped and heat embossed the image again and glued it in place. To finish it off I added a journaling spot, which I had also stamped with the sentiment and a die-cut. 

Supplies: cardstock (My Mind's Eye), stamps (Simon Says Stamp and Studio Calico), die cuts (Pretty Little Studio and My Mind's Eye)

   Now on to the last card, which is a birthday card. I know it seems odd to use that type of stamp on a birthday card but with different colors used it totally works. 
 
Supplies: cardstock (Cardstock Warehouse, My Mind's Eye and Paper Studio) stamp (Simon Says Stamp and Paper Studio), die-cut (Crafter's Companion), ephemera (My mind's Eye), and sequins (SpiegleMom Scraps), inks (Altenew)


Birthday Party Card

   This past Saturday was World Card Making Day, I spent part of the day creating cards. This card I am about to share with you is called a U-fold card. I have never created one before. It was fun to do. You can find the instructions on a blog called Beccy's Place. 
Supplies: cardstock (Cardstock warehouse), pattern paper (Simple Stories), border punch (Fiskars), die cuts (Frantic Stamper), ephemera (Bella Blvd.), sequins (SpiegleMom Scraps)  

 I love the confetti curtain. I am going to be posting more of the cards that I created from Sat. 


Wednesday, September 16, 2020

Zucchini Cookies

    Welcome, everyone. Today's post will be a little different. I won't be sharing any papercraft or sewing projects or shop update. Instead, I am going to share a recipe that I can up with that is so good. 

   Here is a little history. A year ago, my family stopped eating flour products, except on holidays (birthday and Christmas). Let me say it is no easy to forgo the flour so I had to get creative. Like soups, I will use pureed cauliflower to thicken them. However, I never really found a great sweet substitute until last week when my brother wanted cookies for Labor Day. I looked all over online to find something that was keto zucchini cookies but didn't find a recipe that I liked 100% for I used the basics ingredients and came up with the following.

Ingredients: 

11/2 c. zucchini shredded and squeeze all the moisture out 

1 1/2c. ground cashews (I ground with 1Tbsp. honey them until super fine and almost a butter.)

2 tsp. cinnamon

1Tbsp. vanilla extract

1 1/2 tsp. baking soda

2 scoops of whey protein

2 small apples, diced (I used Honeycrisp)

2 Tbsp. honey

2 eggs 

1 c. chocolate chips (optional, and you can always use more than a cup)

Directions: 

1. Preheat oven to 350. 

2. In a mixing bowl mix together the cinnamon, eggs, baking soda, honey, vanilla, and protein powder. Mix well until honey is evenly distributed.

3. Now fold in the zucchini and apples. If you are using chocolate toss those in as well.  

4. Spoon dough by tablespoon onto a parchment-lined cookie sheet. Leave 2" space between cookies. 

5. Bake for 11-14 minutes. 

Makes about 2 dozen. 


Monday, September 14, 2020

Anniversary Card - SID

   This month's card sketch from Stick It Down is a fun one that can allow you to do some fun elements. 
   Here is my take on the sketch. I created this elegant "love" card for my parents' 40th anniversary. I used a lot of red since I went with the traditional "ruby" theme anniversary. 
Supplies: cardstock (Cardstock Warehouse), pattern paper (Bo Bunny), washi tape (Scotch Brand), manual die (Paper Smooches), sequins (Treehouse Studio), dew drops (The Robin's Nest), embossing folder (The Paper Studio), tools (We R Memory Keepers, and Spellbinders), other (foam tape and plastic)
   The fun element that I did on this card was doing a shaker filled with dew drops and sequins. 


   Be sure to play along. You have until the end of the month to play along with any - or all! - of our sketch challenges. Just post a link to your creation in our sidebar. If you share on social media, be sure to tag #StickItDown. 

One randomly selected winner will receive a prize! We'll also choose one winner from each sketch to be a guest designer!


Friday, September 11, 2020

Make A Wish - DRU

    Hello, and welcome. Today is my last post as part of the Dies R Us team. I  am stepping done since the holiday season is busy for my shop.  I will be sharing with you today a shaker card 

I am sure you are like me and you have rolls of washi tape to last a lifetime. Here is a little tip match the print up and create a pattern paper with it. Adhere this to a card base. My card is 7" x 4" so I did the pattern paper a 1/4" smaller. 
I love these edger dies. All I did was run it through my die cut machine and took a craft knife ad removed the inside to create a frame. Now on the back of the frame, you would want to use a strong double-sided adhesive to attach a piece of plastic, I used an old page protector. After, the plastic is in place cover the inner frame edge with a foam adhesive. Set aside while we create the confetti. 
Now with the mini dies I did multiple cuts of each. This will be part of the confetti filler in the shaker. 
In the center fill the card up with the confetti die cuts and sequins. Since this shaker fills the entire card front I added a lot of filler. 
   Now, remove the foam adhesive backing from the frame and carefully line it up to the card. Press the frame edges down firmly to ensure no confetti of escaping.  Give it a shake and you are now done. 

 Dies R Us Product Used:

Don't forget to come to join in the fun at the Dies R Us Challenge Blog.  There's a new challenge theme offered on the 1st and 15th of each month and one lucky randomly drawn winner will receive a gift voucher prize to the Dies R Us Store.  For your convenience, all the important Dies R Us links are provided below.


Click below for:

Friday, September 4, 2020

Party Easel Card - DRU

 Welcome back. Today, I have a Dies R Us post. It is a fun easel card. This type of card looks advance but it is super easy to put together. 

   First off you need to die cut the base with a large die, I used one from Spellbinders. Place the folded cardstock within the die so you get a connected shape. You will also need to die cut the same shape again but no need for the fold. I am also using the dies to die cut the pattern papers that will be used to decorate. 
To create the easel fold the front of the card base in half. Then, glue the extra die to the folded half. 
I used the dies from Frantic Stamper to create the embellishments. Monique was die cut twice so her dress was different. To add more personality to her I used markers to color her hair and shoes.  
   Here it is all decorated. I even added layers of dies to the inside of the card. This also helps to keep the card open popularly. 


 Dies R Us Product Used:


Don't forget to come to join in the fun at the Dies R Us Challenge Blog.  There's a new challenge theme offered on the 1st and 15th of each month and one lucky randomly drawn winner will receive a gift voucher prize to the Dies R Us Store.  For your convenience, all the important Dies R Us links are provided below.


Click below for: