Showing posts with label gelatos. Show all posts

Friday, April 8, 2016

Having the Best of Times - SBC Liftapalooza

   Today's lift at Scrapbook Challenges is on Karen.

   Here is my take on it. As you can tell I followed the original page very closely. The misting in the original piece really inspired me.  For the background pattern I used a assortment of watercolor crayons, mists and inks with two different masks. 
Supplies: cardstock (Bazzill Basics), pattern paper (Studio Calico and Fancy Pants Designs), stickers (American Crafts), masks (Hazel & Ruby and Studio Calico), die cuts (Basic Grey and Jillibean Soup), manual die (Studio Calico), die cutter (Spellbinders), watercolor crayon (Faber-Castell), ink (Stampabilities),mist (Tattered Angels), sequins (Studio Calico), border punch (Fiskars), washi tape (The Paper Studio)

   Here are a few close-ups. I didn't have the letter "A" in the thickers so I took an "N" and trimmed a piece off and uses it as my cross section for the "A".

   This quote has been hanging around in my stash for a while now and I thought it was perfect for this page since I didn't have anything to say. 
 Don't forget to link up your creations on the Mr. Linky at Scrapbook Challenges to have a chance at winning this month's prize.

Monday, November 23, 2015

Farmers Blooms - SBC #460

   It is the start of a new week and for like most people this week is going to busy. It is a tad busier for me since today is my dad's birthday.

   Today's Scrapbook Challenges sketch reveal is #460. I love the starburst in it. 

   For this page I knew I wanted to use a bright photo.   There is not much of a story to the flowers just something my dad wanted to pick up for my mom at one of the many Farmer's Market outings this summer.  
 Supplies: cardstock (The paper Studio), pattern paper (Echo Park, My Mind's Eye and Crate Paper), washi tape (My Mind's Eye and Doodlebug Designs), stamps (Studio G and EK Success), chipboard (Prima), die cuts (Basic Grey), stickers (Basic Grey and American Crafts), ink (Momento and Close to my Heart), sequins (Studio Calico), gelato (Faber-Castell)

   The starburst was a little tricky to master but thanks to washi tape it hides all wonky cuts and pen lines. 

    I first started this on a white sheet of cardstock but I started adding all the embellishments and papers I was hating that stark white. I ended up taking some flower stamps and stamped it in three different inks. Then took gelatos and colored the background paper. I think it turned out great and was a perfect way to turn a page I was not liking into something that is so cheery,

Sunday, August 23, 2015

Time to Celebrate Party Hat

Last month, I recieved a email from Susan Brown, the lady in charge of the Anything But A Card challenge site. She contacted all the previous remembers in order to celebrate the Anything But A Card challenge blog's last challenge before closing. This challenge is marking the 50th challenge they have hosted since it started back in September of 2012. The site was founded by Carla Heibert, she gave my first taste of being part of a design team.

For such a milestone and the sad ending of a great site that stretched your creative muscles, I decided to create a party hat for the "Celebration". 

Supplies: cardstock (The Paper Studio),chipboard (Paper pad back), tissue paper (Hazel & Ruby), paint (Tattered Angels), ink (Tim Holtz), marker (Bic), masks (Hazel & Ruby), gelatos (Faber-Castell), sequins (Hazel & Ruby), glitter glue (Stickles), twine (The Robin's Nest), trim (American Crafts), and electronic die cutter, software and cartridge (Provo Craft). 

   I first created the hat shape with the chipboard backing from a paper pad that I used up. Then I started having fun with tissue and the color mediums. Surprisingly, I didn't get my hands too messy.  For the glitter touches I saved myself a bei headache by opting for the Stickles instead of the loose glitter. 

   The little pom-pom was created with jute twine. I am still in love with pom-poms after 3 years so I added a nice amount to this little hat by trimming it out with pompom trim.

   Thanks for stopping by and helping the me and he rest of the ABAC family celebrate out time sharing and inspiring others with our creations. 


Thursday, June 26, 2014

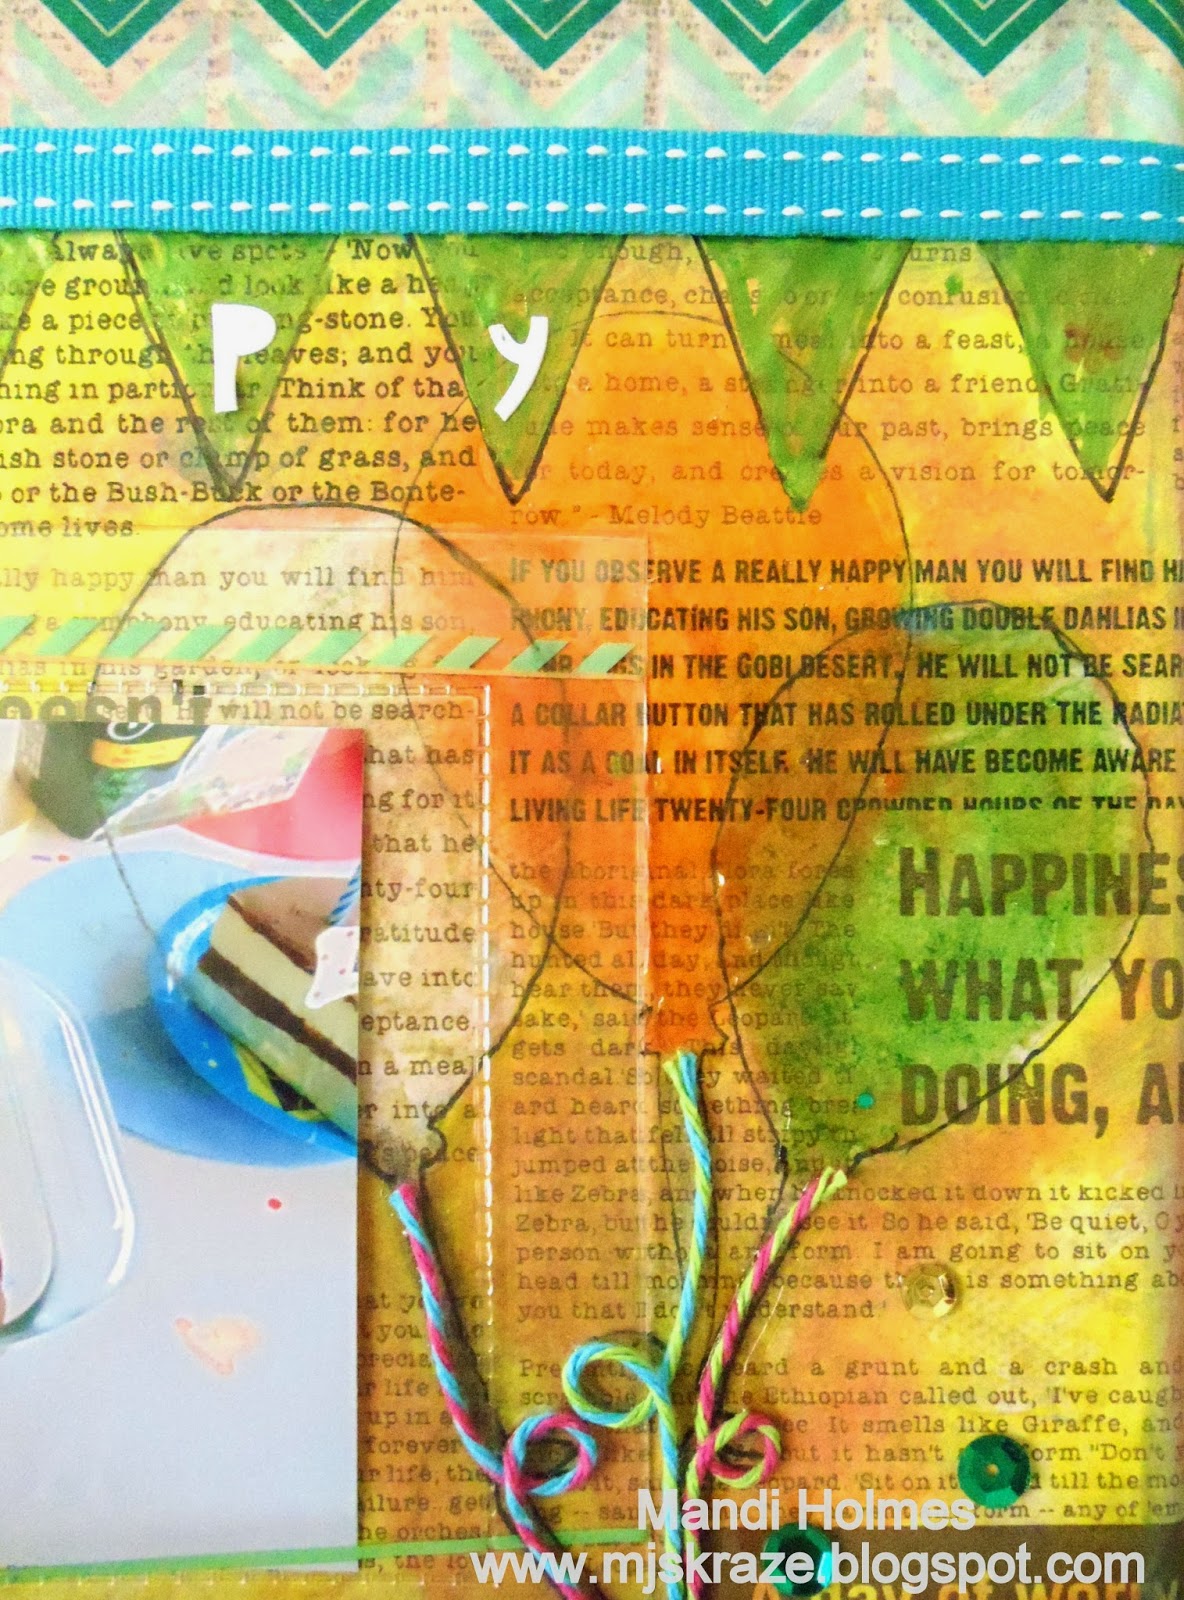
Birthday Canvas

Monday I was in a mood to get a little messy. When that mood comes around it is time to break out a canvas. I am not sure if the secret to that mood is to only have three hours of sleep and work outside all day or maybe it was the fact I just bought 8x10 canvases. Whatever, the reason was I am happy with the outcome of one evening. 
Supplies: pattern paper (Hazel & Ruby), washi tape (Hazel & Ruby), frame (Hazel & Ruby), masks (Hazel & Ruby), paint (Smooch), ink (Prima), stain (Tim Holtz) gelatos (Faber-Castell), trim (American Crafts), twine (Timeless Twine), ribbon (My Mind's Eye), sequins (Hobby Lobby and Hazel & Ruby) pen (American Crafts), electronic die cutter and cartridge (Provo Craft) and glue (Ranger and Elmers)
   First, I want to say sorry I don't have pics of the steps on how to create this. Like I stated before, I did this at night so photos would have been a bad quality.   
Directions:
1. I first mixed elmers white glue with some stain and adhere torn pieces of the floral  paper to the canvas.
2. While it was still wet I adhere the collage tissue paper and washi tape.
3. Add the balloon mask and then just go to town with the gelatos and ink.
4. Lay the banner mask across the top and outline it and the balloons with a pen. 
5. Remove masks and paint banner. Add stickers
6. Adhere sequins, frame, die cut and twine. 
7. Where the frame covers the balloon draw the  balloon on top of the frame. This allows the balloon shape to show once a photo in the frame.
8.  Add Glossy Accents to the orange and green balloons. Only do it to those two because the other one is already shiny from the frame. Make sure you do this last because you don't want to smear the glue or drop anything into it. I am not speaking from experience. ;) LOL
Here are some close-ups. 

You can tell here that some of the floral paper peaks through the washi tape. 
                                      
I thought this was a great birthday decoration because I can change the photo to whomever's special day it is. Just for photography purposes I stuck a brownie photo in the slot.
Here is what my studio looked like after this little canvas. I guess I just didn't get messy on the canva. :)

This was my first time to really play with all the great Hazel & Ruby stuff I got from a shopping spree on won from them back in May. As you can probably tell I am a huge fan now. 

Monday, March 10, 2014

Sketch 384- Did You Say Smile?

It is Monday and that means another sketch reveal over at Scrapbook Challenges. Sketch #384 is one of my favorites at first but it soon turned to be a hard to complete I also incorporated one of the added Scrapbook Challenges challenge, I used gold on my page.
The reason was the triangles weren't cutting it for me. I ended up changing them out for a chevron mask, chipboard and wood veneers.
Supplies: cardstock (The Paper Studio), pattern paper (Studio Calico), stickers (American Crafts and Simple Stories), wood veneers ( Studio Calico and Freckled Fawn), flair (Studio Calico), tag (Elle's Studio) chipboard (Um Wow Studio), gelato (Faber-Castell), modeling paste (Liquidex), mask (Studio Calico), chalk inks (Stampabilities and Quick Quotes), stamp (Jenni Bowlin Mercantile) sewing machine and black thread 
I smeared a gold gelato on the background paper, added some modeling paste, inks, chipboards and veneers to my trouble area. I love the interest it added to my dead space.  
 This photo was taken 20+ years ago of my Jido. He knew he was getting his photo taken so he acted like a nut and did this face. That was the king of man he was. He didn't care how he looked or acted but had a super big heart that made you love him.
Be sure to play along this month at Scrapbook Challenges for the chance at winning the Freckled Fawn prize and a guest design team spot for the month of April.

Monday, September 30, 2013

Hello Boots

Over at Scrapbook Challenges today is a another sketch reveal. This is #364 sketch that looks very inspiring. 

Supplies: pattern paper (LillyBee Designs, Echo Park, and Crate Paper), chipboard (Crate Papers and My Minds Eye), twine (Timeless Twine), doily, stickers (Fancy Pants Designs) , gelato (Faber Castell), brad (Crate Paper) and flowers (My Little Shoebox)

For the banner on this page I altered a premade chipboard banner by My Mind's Eye. I cut the tops off, colored them with a gelato and added stickers over the printed letters that were already on them. 

Wednesday, July 10, 2013

Gelatos Review

Today, I am going to review Gelatoes. No, it is not the Italian ice cream. It is Faber-Castell gelatos that are used in mixed media projects.
A couple of weeks ago I won this kit off of Northridge Publishing's blog.
I ended up try a few techniques with them.
The first tag I did the dry technique. Spe easy to do. Color directly onto  the tag and blend with fingers. On both tags I stamped on them with the gelatos. I colored directly on the stamps, misted with water and stamped. It give it a nice water color look to your images. . 
On the right I did the dr technique with multiple colors. They blend nicely together. I then colored the outside with an orange gelato and blended it out with a pet paintbrush. The last tag I did the wet technique to creat this ombre tag. I also made a mist with the gelato. Just take a chunk of it on dissolve it in some water and pour it into a little mister. Works great. 
 I am on Love with these and am sure happy I have ten colors to play with but now I want the rest of them. My favorite thing in that I could make mist from them.
I hope you enjoyed this review.