Thursday, February 11, 2021

2020 Dec Daily

   Today I am going to a quick share of my 2020 December daily Coptic album. I created this with items in my stash. The cover is made from old cutting mates from my Cameo. It cut them in half, doubled them up, and covered them with brown shipping paper. I then decorated it with pattern papers and stickers. This is my first Coptic book I made isn't so cute?

 Also, this year, we did a family advent calendar so each day we did something as a family together, so you will see a lot of white paper slips tucked in this album.

   Now, here it is not so cute. This thing is packed, I shouldn't have used so many thick things in this, I was trying to use up those number Thicked and created cardstock envelopes to tuck in daily journaling. Now, I need to make an elastic band for this so it stays close. Good thing the cover is flexible.  

   I did a total of 5 signatures in the book. I broke it down into weeks and the last one holds miscellaneous things like a movie checklist, new Christmas decor pics, etc. 

   When I made this album I made it a 6"x12" so I didn't have to trim the papers down. Also, I added some pocket pages so I could just slip photos in. I might have added too many page protectors in so I trimmed one out on the days that I didn't need them. 

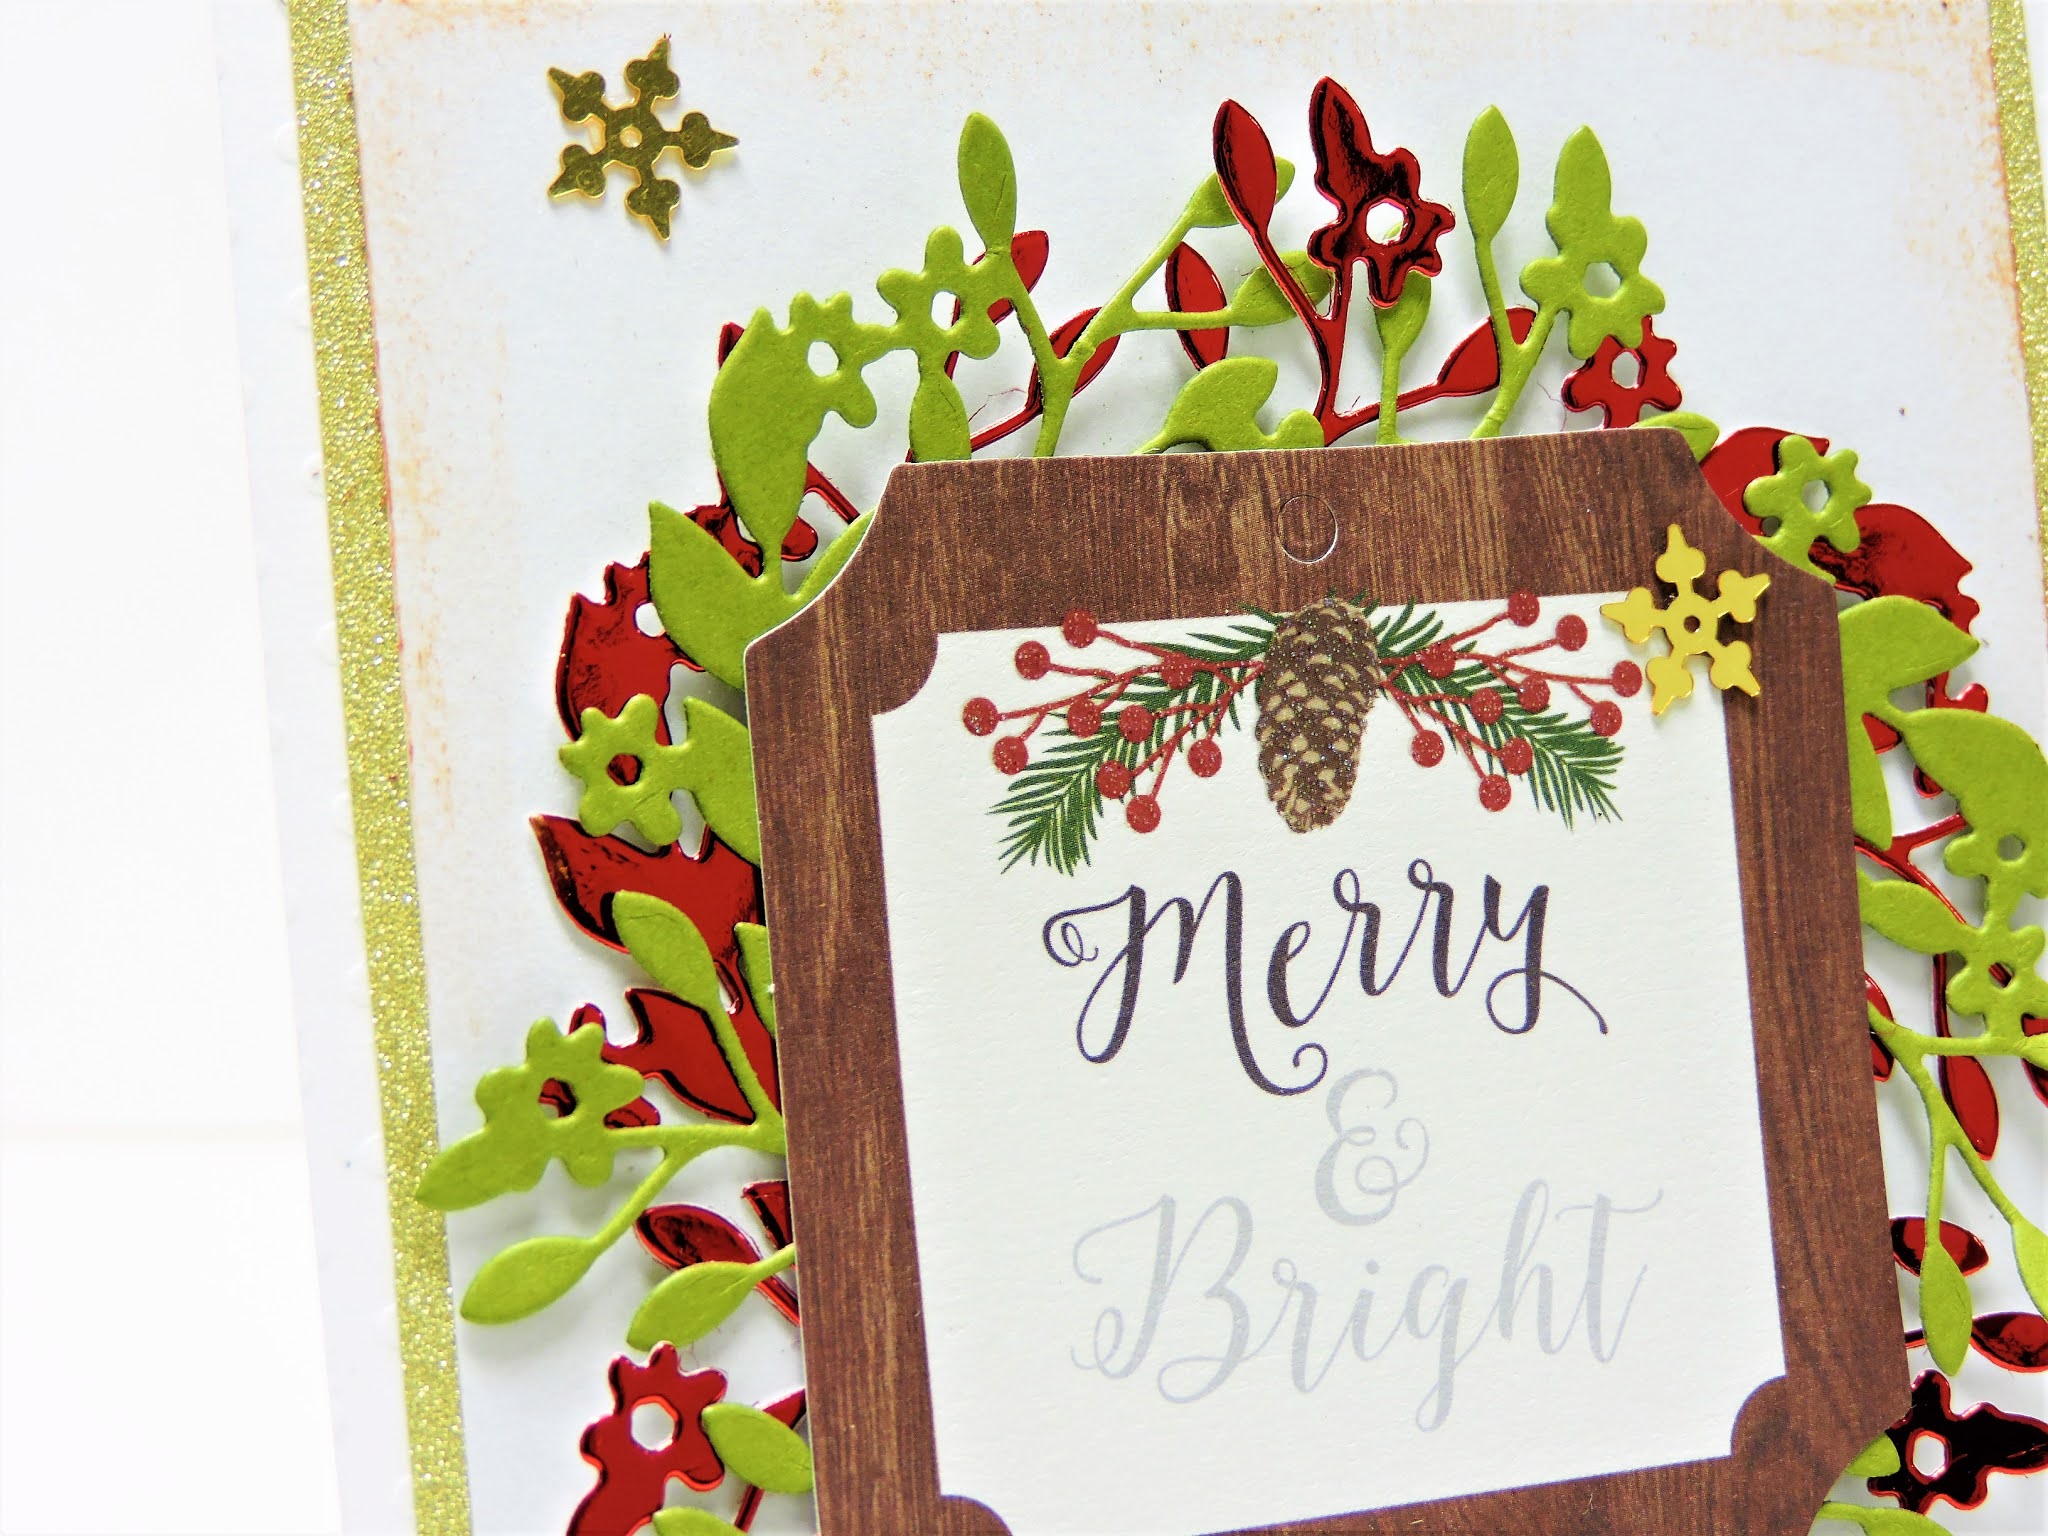
   I love this day 6 spread. I added a cut pop-up feature and typed my journaling on parchment. 

On day 12, I had one of those bulk cardstock envelopes to a score sheet from the game of Password.


   On days 14 and 16 I kept a very simple, I added some photos and stuck the advent calendar activity paper to it. My album was filled with a lot of cooking and shop work photos. 

Here is a look at the 5 signatures in the album. I always add a calendar to my albums to write our dinner meals on. It is fun looking back over the years to see what you eat. I also added the Hallmark movie checklist. I can say I watched over half on both stations. 

Here is one last photo. This page shows one of the new Christmas trees and behind the journaling cards shows the Christmas card list. 


I hope you enjoy the long post of a few photos of my Christmas 2020 album. The reason why I shared this now is that I just finished it. Christmas is my shop's busy time so I always so slow at finding motivation on completing it after Christmas. This year's motivation was brought to you by nothing on TV because of the Super Bowl.  


Monday, February 1, 2021

Feb. Card Sketch

    Hello everyone. This month I am the featured member at Stick It Down for the card sketch so I am posting my card earlier than usual. 

This month I created this Valentine card that features a mixture of older papers from The Paper Studio and Studio Calico. The cardstock and fabulous mirror cardstock is from Cardstock Warehouse. 

 
 Isn't this mirror cardstock great. It sure brings more wow facture to paper projects. 

   I used my typewriter for the sentiment strip. I love the look of this. I accented it with some sequins by Spiegle Mom Scraps.
Here is what you need to do if you want to play along. You have until the end of the month to play along with any - or all! - of our sketch challenges. Just post a link to your creation in the Stick It Down sidebar. If you share on social media, be sure to tag #StickItDown. 

One randomly selected winner will receive a prize! We'll also choose one winner from each sketch to be a guest designer!

Wednesday, January 20, 2021

Jan. Card Reveal

This month's full card sketch at Stick It Down reveal can be found here
I created this card using the Storyline paper collection by Heidi Swapp. For the sentiment tag, I used a journaling tag from Pebbles Inc. 


   Here is a closer look at it, I love the splatters. 

You have until the end of the month to play along with any - or all! - of our sketch challenges. Just post a link to your creation in Stick It Down's sidebar. If you share on social media, be sure to tag #StickItDown.

  One randomly selected winner will receive a prize! We'll also choose one winner from each sketch to be a guest designer!


Saturday, January 2, 2021

Glue Review

    Happy New Year! I thought the first post of the year should be all liquid adhesive. I recently came across glues that I love and other not so much, so I thought I will do a little glue review. 

First up is a glue that I hate. Ad tech Crafter's Precision Glue

   This stuff is worse. It takes forever to dry. As in once you use this glue you better be down crafting because the item will just slide around for a long time before it sets. Also, gluing paper to paper with this glue causes the paper to wrinkle. I also found out once the glue did dry is was super shiny and items popped off. 


The next option was the Gina K Connect Glue. 
This glue is good for gluing tiny items. It sets up quickly and dries clear but with a shine. However, the cons for me were that the glue sometimes seemed like it separated in the tube and it came out watery. It clogged and was hard to get it to start flowing again. 


Up next in the Scotch Tacky Glue

   I love how thick it is and it sets up super fast so papers don't shift while crafting. I like this glue but had to find a different option since it was sold out when I needed more. This didn't cause any wrinkle problems and items stuck really while. Plus, I needed to find a more economical option since I use a lot of glue in my business and I was going through a bottle within 2 months.


Last and best, Bearly Art Glue

   I love that it has tip options. It comes with a super fine point, great for die cut layers, a medium tip that is still precise but great to use on larger areas. Also, you can just use the bottle tap for large areas. The papers don't wrinkle, sets up fast, and dries clear with minimal shine. Also, it doesn't clog, as long as you clean the tip when you are ready to store it. 


   I hope you enjoyed my glue review. If you have a favorite glue please leave a comment. 


Monday, December 21, 2020

Merry & Bright - SID

   Welcome and Merry Christmas to all. This month's reveal of Stick It Down card sketch. When I say this month's sketch it screamed Christmas card. I changed it up a bit by moving the sentiment spot to the center. 
I kept it fairly simple by just using plain cardstock.  
Supplies: cardstock (Cardstock Warehouse), sequins (SpiegleMom Scraps), die (Crafter's Companion) die-cut (My Mind's Eye), wax (Crafter's Companion)
   Here is a closer look. The white cardstock has a pearl finish which I aged the edged with a gilding wax. 

   As you can see plain cardstocks can make really elegant cards. I love the snowflake scatter.
You have until the end of the month to play along with any - or all! - of our sketch challenges. Just post a link to your creation on Stick It Down blog's sidebar. If you share on social media, be sure to tag #StickItDown.

  One randomly selected winner will receive a prize! We'll also choose one winner from each sketch to be a guest designer!

Monday, November 23, 2020

It's The Most .... - SID

    Can believe it is already mid-November?  You know what that means it is time for Stick It Down card sketch reveal. 

   With this sketch, the heart dangles inspired be to create a Christmas card. 
Supplies: cardstock (Cardstock Warehouse), embossing folder (Echo Park Paper Co.), sequins (SpiegelMim Scraps), sticker (My Mind's Eye), ink (Altenew)

   The banner was a sticker that I backed with cardstock to turn it into a die-cut. I then used foam adhesive to attach it. 

   I love how the glitter cardstock makes this simple card are eye grabber. 
You have until the end of the month to play along with any - or all! - of our sketch challenges. Just post a link to your creation at Stick It Down blog in the sidebar. If you share on social media, be sure to tag #StickItDown.


Monday, October 19, 2020

A Spooky Card - SID

 Today I will share with you my take on this month's card sketch from the Stick It Down blog.  I don't typically do Halloween cards but for some reason this sketch made me think of Halloween. 


   As you can tell, I followed the sketch 

Supplies: pattern paper (Authentique) cardstock (Cardstock Warehouse), sequins (SpiegleMom Scraps washi tape (The Paper Studio), sticker (Authentique), and die cuts (7 Gypsies)

   The moon image and "October 31st" was a journaling card that I cut the bottom off (October 31st), matted it, and moved it to the top of the moon. 

   I also, couldn't resist adding a little sparkle to the card so I went with purple sequins and stars.

You have until the end of the month to play along with any - or all! - of our sketch challenges. Just post a link to your creation in our sidebar. If you share on social media, be sure to tag #StickItDown.

  One randomly selected winner will receive a prize! We'll also choose one winner from each sketch to be a guest designer!

Saturday, October 10, 2020

Birthday Wishes

    At the moment I am in love with the slimline card trend. I don't know why but this is my third card this week that I created in that style. The card I am sharing with you tonight is based on the Sketch~N~Scrap WCMD #2 sketch. 

   Here is my take on the card. Sorry for the bad photos lighting in my studio is bad and I didn't want to go downstairs and set up the photo board. 
Supplies: cardstock (Paper Studio and Cardstock Warehouse), pattern paper (Heidi Swapp and Simple Stories), brad (Terresa Collins), ribbon (?), stickers (Heidi Swapp), manual dies (Crafter's Companion), and electronic die cutter (Silhouette America) 

The sentiment was die cut from wood paper. I love how it looks on the rose gold mirror paper by Cardstock Warehouse. 

   I love this bias ribbon that I had in my stash. It goes so well with the two collections that I used on this card. 
 
   The cut file that I used is free from Scrapbook & Cards Today. 


Tuesday, October 6, 2020

One Stamp Three Ways

   Here are three cards that I created for the Scrapbook & Cards Today blog challenge "1 Stamps 3 ways". The stamp I used was the pinecone background stamp by Simon Says Stamp. 
I ended up creating a Christmas card, thank you card, and a birthday card all using the stamp as my base image. 


   For this Christmas card, I kept it really simple. I heat embossed the background stamp image in a nice cranberry embossing powder. To finish the card I matted a journaling card and adhere it to the card. 
Supplies: cardstock (Paper Studio and Cardstock Warehouse), journaling card (Graphic 45), embossing powder (?)

Up next, is the thank you card. I first stamped the image on kraft cardstock and mounted that to the card front. I then stamped and heat embossed the image again and glued it in place. To finish it off I added a journaling spot, which I had also stamped with the sentiment and a die-cut. 

Supplies: cardstock (My Mind's Eye), stamps (Simon Says Stamp and Studio Calico), die cuts (Pretty Little Studio and My Mind's Eye)

   Now on to the last card, which is a birthday card. I know it seems odd to use that type of stamp on a birthday card but with different colors used it totally works. 
 
Supplies: cardstock (Cardstock Warehouse, My Mind's Eye and Paper Studio) stamp (Simon Says Stamp and Paper Studio), die-cut (Crafter's Companion), ephemera (My mind's Eye), and sequins (SpiegleMom Scraps), inks (Altenew)


Birthday Party Card

   This past Saturday was World Card Making Day, I spent part of the day creating cards. This card I am about to share with you is called a U-fold card. I have never created one before. It was fun to do. You can find the instructions on a blog called Beccy's Place. 
Supplies: cardstock (Cardstock warehouse), pattern paper (Simple Stories), border punch (Fiskars), die cuts (Frantic Stamper), ephemera (Bella Blvd.), sequins (SpiegleMom Scraps)  

 I love the confetti curtain. I am going to be posting more of the cards that I created from Sat.