Thursday, June 26, 2014

Birthday Canvas

Monday I was in a mood to get a little messy. When that mood comes around it is time to break out a canvas. I am not sure if the secret to that mood is to only have three hours of sleep and work outside all day or maybe it was the fact I just bought 8x10 canvases. Whatever, the reason was I am happy with the outcome of one evening. 
Supplies: pattern paper (Hazel & Ruby), washi tape (Hazel & Ruby), frame (Hazel & Ruby), masks (Hazel & Ruby), paint (Smooch), ink (Prima), stain (Tim Holtz) gelatos (Faber-Castell), trim (American Crafts), twine (Timeless Twine), ribbon (My Mind's Eye), sequins (Hobby Lobby and Hazel & Ruby) pen (American Crafts), electronic die cutter and cartridge (Provo Craft) and glue (Ranger and Elmers)
   First, I want to say sorry I don't have pics of the steps on how to create this. Like I stated before, I did this at night so photos would have been a bad quality.   
Directions:
1. I first mixed elmers white glue with some stain and adhere torn pieces of the floral  paper to the canvas.
2. While it was still wet I adhere the collage tissue paper and washi tape.
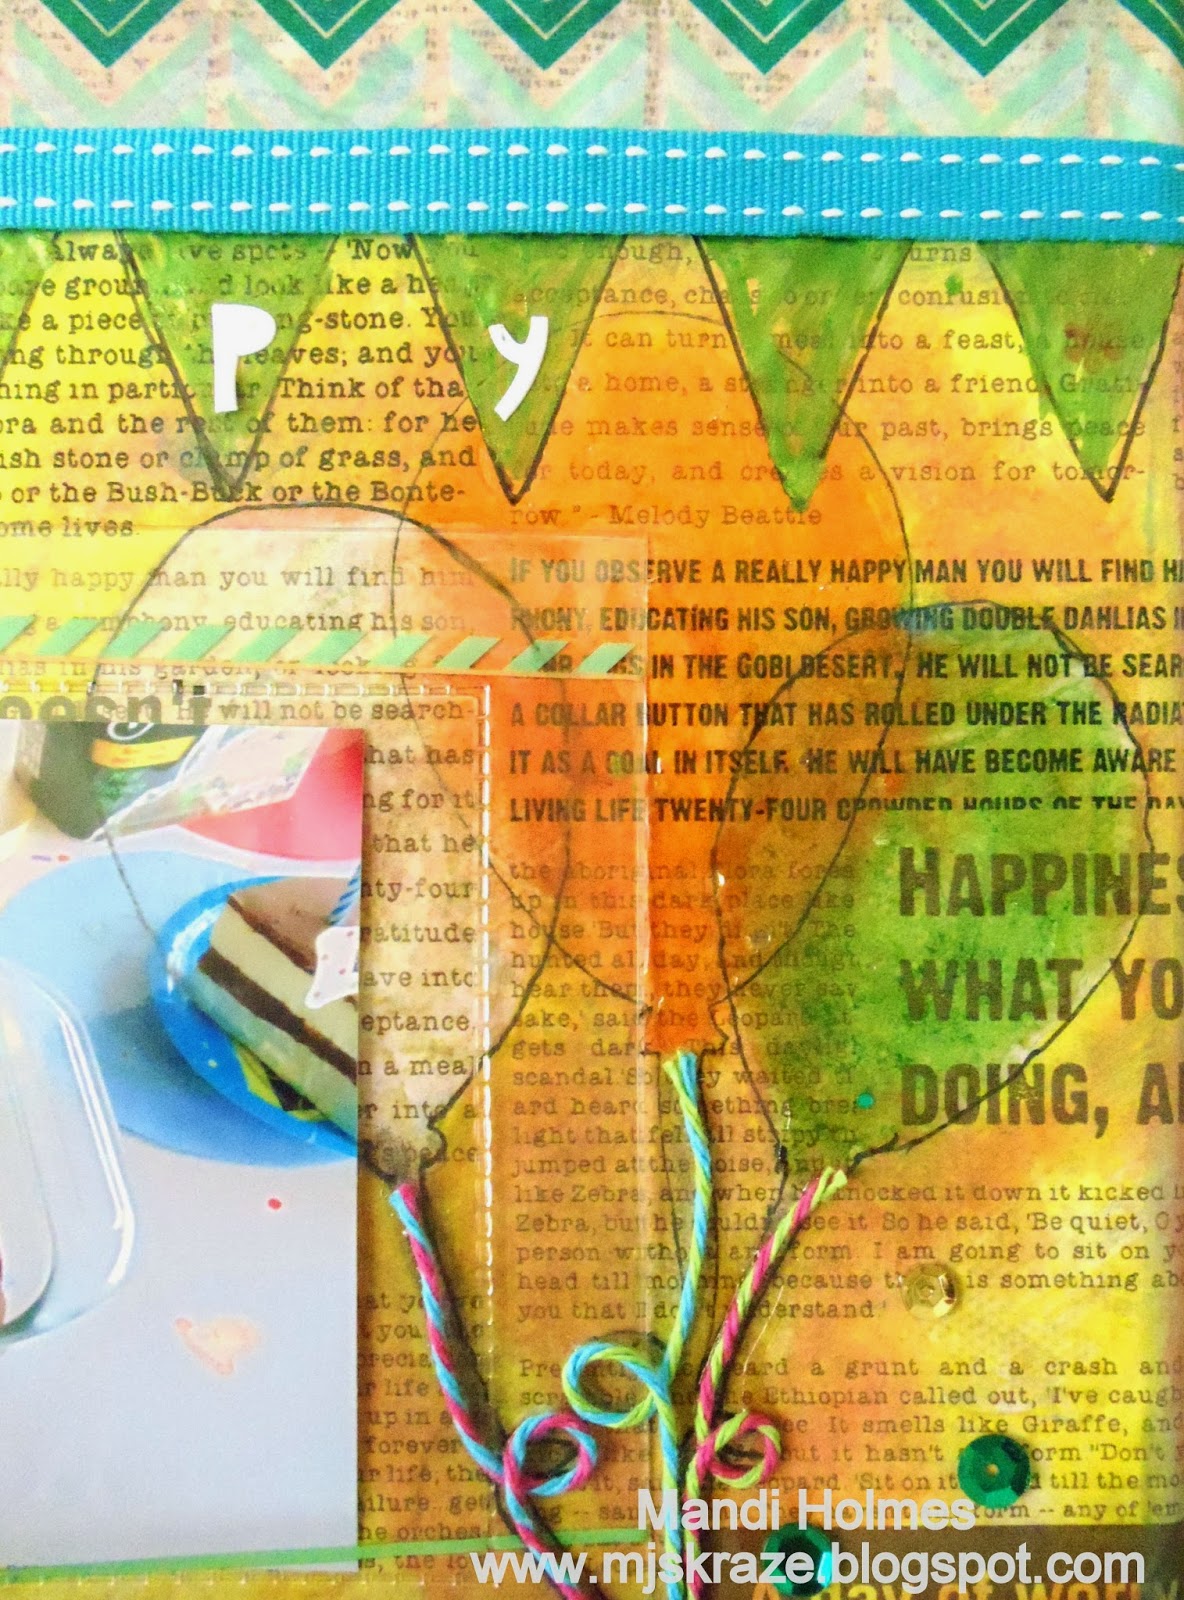
3. Add the balloon mask and then just go to town with the gelatos and ink.
4. Lay the banner mask across the top and outline it and the balloons with a pen. 
5. Remove masks and paint banner. Add stickers
6. Adhere sequins, frame, die cut and twine. 
7. Where the frame covers the balloon draw the  balloon on top of the frame. This allows the balloon shape to show once a photo in the frame.
8.  Add Glossy Accents to the orange and green balloons. Only do it to those two because the other one is already shiny from the frame. Make sure you do this last because you don't want to smear the glue or drop anything into it. I am not speaking from experience. ;) LOL
Here are some close-ups. 

You can tell here that some of the floral paper peaks through the washi tape. 
                                      
I thought this was a great birthday decoration because I can change the photo to whomever's special day it is. Just for photography purposes I stuck a brownie photo in the slot.
Here is what my studio looked like after this little canvas. I guess I just didn't get messy on the canva. :)

This was my first time to really play with all the great Hazel & Ruby stuff I got from a shopping spree on won from them back in May. As you can probably tell I am a huge fan now. 

Monday, June 23, 2014

SBC Sketch Reveal #399

   Happy Monday, everyone. Right now, I am glad there is such a thing as autopost. The reason is that you probably would have to wait for this reveal for a few days. My dad is off work for a few days so I am heading back to the storage place with him for the next couple of days. We are going to reside the back now. Luck us. Not. I don't mind doing it but don't like the fact my dad saw a skunk back there last year and it was walking towards him. I am so hoping we don't see another one. 
   Sketch #399 reveal for Scrapbook Challenges. I ended up using the sketch and doing one of the challenges. The challenge was to create a card. I so jumped on that chance. 
Supplies: pattern paper (Studio Calico) chipboard (Um Wow Studio) wood veneers (Studio Calico ) journaling card (Project Life) paperclip (Maya Road) washi tape (My Mind's Eye and Doodlebug Designs) tag (Elle's Studio) punches (EK Success and We R Memory Keepers)
   Here is the card. I love how this came out.
    I cut a project life car down and used it for the end panels.
    The best thing about the envelope board punch is that I can make any size card and have the envelope match the card and seal.

 I recently bought a 1" circle punch so I can make the seals while I make the card. I know it sounds like a Duh moment but it is so much better than using the Circut and try to line everything up on a small scrap.

Wednesday, June 18, 2014

Scrapbook Challenges Reveals (Super Long)

   It has been three weeks since I posted a reveal for SBC. During, the blogging vacation I have spending my time working with my dad on the storage renovation, cooking and avoiding my studio at all costs since it is like an oven in there during the summer.
Speaking of storage, the first page is about the progress. It uses sketch #396.
Supplies: cardstock ( The Paper Studio), pattern paper (Teresa Collins and My Mind's Eye), washi tape (My Mind's Eye), chipboard, (My Mind's Eye and Teresa Collins), diecut (My Mind's Eye), brads (My Mind's Eye), twine (The Robin's Nest), pen (Uniball) and stickers (Pebbles Inc. and Heidi Swapp)

   Here are some close-ups of the journaling. I am loving those little chalkboard tags and the little envelopes. 

   This page came together very quickly for me. Usually, double layouts are my nemesis. I never can get the papers to line up so one side is like a 1/4 inch lower, which this drives me crazy. However, thanks to one of my favorite scrappy items I don't have have that problem. Can guess what it is? It is washi tape. I first line my background papers side by side and ran the tape across both pages. I then added all my embellishments and papers. I kept the pages connected when it came time to photograph the spread.  Thanks to my dear friend, Kelly, she turned me unto Teresa Collins papers. I am loving it.
   
   This next page uses sketch 397. This is another My Mind's Eye page. I think I might have a problem with this company. I have lots a paper from them but rarely use it, until now.
Supplies: cardstock (The Paper Studio), pattern paper (My Mind's Eye and October Afternoon), stickers (My Mind's Eye and American Crafts), chipboard (My Mind's Eye) twine (Timeless Twine) stitch template (American Crafts)
   On this page I played Mad Doctor with the thickers. I hate when I have the perfect color of them and realize that I don't have the correct letters. To correct this problem the craft knife comes out and it is time to get creative. For example, 3's becomes E's and 8's becomes S's.
Here is a close-up of my mad doctoring skills. 
On this page, I wanted to scrap an older photo since I was getting tired of doing current moments. A little digging and I came across this cute photo of my mom when she was a silly munchkin.
   Now, onto the current reveal. Sketch 398 was a super fun page that documents the end of an era for quality family television service.I will always miss Sky Angel. 

Supplies: pattern paper (Cosmo Cricket and Carta Bella) washi tape (Studio Calico, Scotch Brand, My Mind's Eye, Hazel & Ruby and Studio G) tags (Studio Calico), wood veneer (Maya Road) stamps (EK Success) ink (Stampabilities and Prima) gelato (Faber-Castell) stencil (Studio Calico) enamel shapes(My Mind's Eye) twine (?) sequins (Studio Calico) stickers (American Crafts) pen (American Crafts) doily and modeling paste.
Here are some close-ups. 


The reason why I said this was a fun layout to make was because it was the first time I got to talk to Kelly. I was a virtual crop. We spent 94 minutes video chatting. It would have been longer if skype didn't keep crashing on me.

   I hereby promise not to get behind on my blogging this summer. I am sure you all are tired of this long post. i just want to say thanks for taking time out to read this. 

Sunday, June 15, 2014

Cross Promo

Happy Father's Day to all the great dads out there. I hope you take the time today and spend some time with him today. Even if he is gone just think of him. 
Over at Child's Play Challenges we are doing the second reveal a couple of days earlier than usual because we are doing a cross promotion with Scrap Our Stash. This challenge's theme is Tie Dye and the cross challenge from Scrap Our Stash is to use this sketch. 
Tie dye inspired me to get messy on this page. I used a lot of color mediums that ended up dye my fingers a little bit. You got to love fingertips that look like you were just finger painting. LOL. 
Supplies: pattern paper (Glitz Design), mist (Heidi Swapp and Studio Calico), enamel shapes (Studio Calico), flair (Studio G), mask (Crafter's Workshop), gelatos (Faber -Castell), stamp (Jenni Bowlin), ink (Stampabilities), butterfly diecut I got it from my friend Kelly. I altered it), tg (Pink Paislee), and doily (Doodlebug Design)
 I used the wet technique with gelatos on this tag. I love that they are so easy to blend with water.
Because tie dye makes me think of peace signs I used a peace mask to mist the design onto the center of this page.
Thanks for stopping by and be sure to stop by Child's Play Challenges and Scrap Our Stash to see what all the ladies made for this fun reveal.