Monday, May 20, 2019

May SID

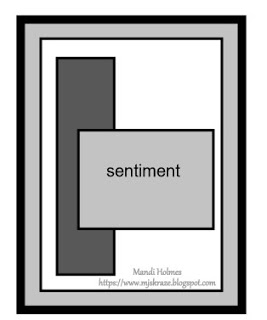
   Welcome to another card sketch reveal from Stick It Down. This month is fun and allows a little mixed media. 
   I created this card for Mother's Day from my dad. I love that big flower cut-out. It was on the cardstock packaging of some stickers from Pretty Little Studio. I love that there packaging is a "freebie" product. 
Supplies: cardstock (Bazzill Basics), sticker (My Mind's Eye), chipboard (Basic Grey), brads Eyelet Outlet), wood veneer (Studio Calico), tag (?) enamel dot (?) stamps (Studio Calico and Stampabilites), ink (Tsukineko), watercolor crayon (Faber-Castell), watercolor paper (Faber-Castell), typewriter (We R Memory Keepers), flower cut-out (Pretty Little Studio)

   Here is a little closer look. I got to use some old items on this. I love how everything flows together. 

  Be sure to stop by Stick It Down blog to see the whole reveal and even play along. This month's sponsor is Cheapo Dies

Friday, April 19, 2019

April SID Reveal

   Sorry, for the delay in my Stick It Down reveal post. A quick family "trip" came up last week so everything got pushed to the back burner.  The term "trip" is in quotes since it involved surgery for my Dad.  

   It is time for April's card sketch reveals at Stick It Down, this month is one that I created. 

   Here is the card that I created. It is a birthday card for my uncle, who lives by the beach so I thought this would be perfect for him. 

Supplies: cardstock (The Paper Studio), pattern paper and die cuts (KaiserCraft), and sequins (SpeigelMom Scraps) 

   This month's sponsor is SpiegelMom Scraps, I used silver star sequins on this card. Who said, sequins can't go on guy cards? 

Friday, March 22, 2019

Paper Trimmer Review

   Welcome to March's product review. Today, I going to review the paper trimmer. A lot of people have a love-hate relationship with this topic because there are so many on the market that don't cut straight.

   Let's first start off saying that I use to own the EK Success Rotary Paper Trimmer. I loved it because it was affordable and easy to use. However, I had to replace it about once a year since I kept wearing out the cutting arm.

   After getting tired of  "disposable" trimmer I bought myself the Cutterpillar Pro V3, which I have owned for about 5 years, However, since I bought this they have upgraded it to a plastic construction which I still hear great things about it. 

   I love the built-in light. Unlike other trimmers, you need to really hold down the paper when cutting to ensure no movement.

   As you can see the grid wore off on mine but I don't mind since the ruler along the top is the way to get the accurate cuts. 

   Also, this has a great storage drawer. 
   The pros of this are that it is long lasting and cuts great. The cons are the cost so if you are a light crafter you might want to go with a Fiskars cutter. Also, this takes up a lot of workspace.  


Monday, March 18, 2019

March SID Reveal

   Welcome to this month's Stick It Down card reveal, be sure to head over to SID to see the whole sketch reveal and all the wonderful inspiration from the other design team members.  The card I will be sharing is a card that I made for my brother's birthday in May. Now, I hope I remember where I stored it until then. 
   Here is my take on it, I followed the sketch loosely as you can see but still kept the bones. 
Supplies: cardstock (Bazzill Basics and The Paper Studio), pattern paper (My Mind's Eye), sequins (Spiegel Mom Scraps), stamp (Simon Says Stamp), manual dies (Crafter's Companion, Spellbinders, and Heidi Swapp), ephemera (Fancy Pants Designs), tools (MISTI, Spellbinders, and Minc), foil (Heidi Swapp), ink (Memento)

   Here is a little closer look at all the foiled goodness. 

   Play along with this month's sketches for a chance to win the prize from our March sponsor Allie's Scrap Shop!

Wednesday, February 20, 2019

Excited

   I finally get to share with you that I have been keeping quiet about for a few months. I have got my first scrapbooking layout published in a print magazine. Tuesday I finally got in my hands my copy of the spring issue of Creative Scrapbooker magazine. I also, I have three cards in it too. 
   Here is a peek of what one of my cards look like in the magazine. 
   I am currently selling the card in my shop. 

Wednesday, February 13, 2019

Review Raskog Cart

   For this month's installment of product review will be about my favorite storage item. I love it so much that I have 2, one in my studio and one in my bedroom (used as a bedside table). It is the Raskog cart from IKEA. 
  
   I have the teal blue one in my studio, which I think is no longer being sold. I have bought it about 6 years ago at a higher price than the $29. I am still crazy in love with it because it can hold all my go-to items.

   On the top shelf,  I store my die cuts (which I have sorted by manufacturer and type. A box holds, holidays, one holds labels and tags, one holds word die cuts and the other holds images.) I sorted them all in little baggies that holds jewelry findings. The boxed are actually recycled device boxes. the top also holds a couple of buckets from Target $1 spot, those I store my sequins and doilies. 

   On the middle shelf, it holds more of the $1 pails. This is where my enamel dots, Christmas wood veneer, and washi tapes are stored. I have my washi sorted by color. 

   The bottom shelf holds items that I don't use that often like, brads, eyelets, and ribbons. However, I have found out storing these items here has made me use them more. 

   Here is the full view of the card. I also have a couple of cups attached to the outside. The front one is magnetic which I have a love-hate relationship with since I knock it off sometimes when I walk by. The other pial is from Hobby Lobby which hooks onto the cart, which I like. 

   As you can see I love organizing but I do it on a budget. I try to reuse boxes, $1 spot items and old glassware. 
   Thanks for stopping by and come back next month for another product review. 

Tuesday, February 12, 2019

Lightbulb Moment

   Have you ever had that lightbulb moment in the middle of cleaning your crafty area that you just had to put it in motion before the mess is cleaned up? While that happened to me last week. I got this great idea of changing my stickers into die cuts. If you are like me, you always go to your die cut stash first when creating and completely forgetting about stickers. 

   I took 90% of my flat stickers and adhered them all to white cardstock, it filled about 10 sheets of 12x12 cardstock. I spent about three days fussy cutting them out. I found it very addicting so the time flew by. 
    I now have a large stash of die cuts. I am so happy about this. However, I did find a downside in doing this, I outgrew my original storage method of storing them in little Target $1 pails. I spent the weekend sorting them and working on the storage problem. I will share in my next post of the solution. 


Friday, February 1, 2019

Feb Stick it Down

   I am glad the weekend is here because the deep freeze that hit Michigan a couple of days ago is gone. I don't like -15 temps and that was without the windchill. 
  Today's post is a quick reveal post of this month's card sketch at Stick It DownThis month's sponsor is Jenny at Scrappin Happy Studio. specializes in handmade scrapbook embellishments, such as flair epoxy. All my products are handmade in her home studio, in the beautiful state of Oregon!
You can visit Jenny at her Etsy store and on Instagram. 
One winner will receive a $20 store credit to the Scrappin Happy Studio!
   
   Here is my take on this sketch. I am planning on giving this card to my dad for Valentine's Day. 
Supplies: cardstock (The Paper Studio and Colorbok), washi tape (Scotch Brand), manual die (Spellbinders), tools (Beautiful Mess, Cricut, Spellbinders, and MISTI), markers (Crafter's Companion, sticker (Pinkfresh Studio), stamp (Simon Says Stamp), and ink (Memento)

   As you can see from this angle that I did a fun cut-out window with a manual die. I think this is the first time I ever did this on a card.  

  This stamp originally had a pizza slice in the dog's mouth but I masked it off when I stamped so I could have it holding a heart instead. 

   Be sure to play along with Stick It Down for your chance at winning the $20 prize certificate. 

Monday, January 21, 2019

Jan. SID Reveal

   
Welcome to Stick It Down first card sketch of 2019. This month the sponsor is Cheeky Studio, find them at 
  • https://cheeky.studio. 
  • FB: Cheeky Studio
  • FB Group: Cheeky Studio Group
  • Insta@truelaine
  • Insta@cheeky.studio
  • twitter: cheeky_studio

This month's sketch is on that I created. It is a super simple design which makes it nice if you are tight on time but want to create. 

   Here is my take on it. I kept the embellishments down since I had so many patterns going on. 
Supplies: cardstock (My Mind's Eye), pattern paper (The Paper Studio), journaling card (Becky Higgins), washi tape (Scotch Expressions), stamp (Concord & 9th), stamp ink (Tsukineko), tool: (MISTI) 

   Stop by Stick It Down blog to see the complete reveal and play along for your chance to win. 

Saturday, January 12, 2019

Bloom Review

   I haven't done a product review in a long time and an online friend wanted to see the Bloom storage container in action. So today, I will be talking about the We R Memory Keepers Bloom. (disclaimer: I didn't purchase it but my parents gave me one for Christmas) 

As you can see I got the white one, which I love. At first glance, it doesn't look like a container but a stand. However, with a twist of the wrist, it is transformed. Plus, it is a one hand operational. 
   With a twist of the top the petals of the bloom open to reveal a total of 15 containers and an additional one in the center. I love the sizes of the "bowls" it offers. As you can see I still have 2 empty petals to grow into :) (pun intended).  
 
   This is how I stored these items before. This was not a great option since it kept gathering dust in the cups and when I knocked it over everything went flying. 

   Pros:
   1. It can hold a lot of little things that can easily get misplaced. 
   2. It keeps the items dust free when closed. 
   3. It has a little weight to it once filled making it hard to knock off the table. 

   Cons:
   1. I think it only comes in three colors. 

   Thanks for stopping by. Tell me what you think, I love reading your comments. 


Saturday, December 29, 2018

Looking Back

  While here we are at another end of a year. A time to reflect on what has happened in the last 12 months but for this girl it is a look back of the favorite projects of the year. 
  Here are my top 12 projects of the year, or the ones that are on my computer and I am too lazy to get photos of the other items. 

I loved this page. I got to use a lot of old products on here. 
    A fun valentine card 
   My first TN spread.
    I think is one of my favorite because I never saw a hot air balloon go by our house before. 
   My grandparent's anniversary card.
    I actually did a pinned project. 
   My first time doing something with a day in the life photos. 

  I love the fun flag border. 

    The first skirt that I sew that had a zipper. 
    Altering wood floor samples and wood stamp blocks. 
   My first layout as a guest designer for the Wild Hare Kit Club
    I am loving making these fauxdoris. 

   Here to hoping 2019 will just be as creativity filled.