Tuesday, December 31, 2013

Looking Back @ 2013

Can you believe another year is already coming to a close. This year has been one with a lot of twists and turns for my family, surgery for Buster (which meant the first time he was left at vet for the night), buying a storage place, etc. Even with all the personal stuff I was able to do a lot crafts which helped me stay sane this year.
I am going to highlight my top 12 projects I did this year. I am picking a favorite from each month.
Jan.
A card I made for Practical Scrappers card contest
Feb.
This page was created for a Colorful Creations challenge.
 March.
A Timeless Twine cross promo.
 April.
I love this card set  that I created for The Robin's Nest.
 May.
A Sketch~N~Scrap page.
 June.
A just for fun page. I am in love with all those layers and textures.
 July.
A double page spread I did for Creating Keepsakes summer camp. 
 Aug.
A Scrapbook Challenges page. 
 Sept.
Another just for fun page. I think that baby squirrel thought I was his momma. 
 Oct.
Of course Buster's costume was my favorite thing I made this month. Groovy. 
 Nov.
Love how this canvas turned out. It was the first time I ever did such a big canvas. 
 Dec.
Scrapbook Generation blog hop page. I am glad I used such a  big corner print  background page. Everything about this I love
Thanks for stepping back in my time to see some of my favorite projects of 2013 and I am sure 2014 will bring even more greatness.
I would also thank the lovely teams I had the pleasure to share some of my year with.
Past Design Teams:
Let's Capture Our Memories ( Jan. 2013 - April 2013 )
Polka Dot Pixies ( Jan. 2013 - June 2013
Sketch-N-Scrap ( Dec. 2013 - June 2013 )
The Robin's Nest ( Jan 2013 - June 2013 )
Anything But A Card  ( Sept.2012 - Aug. 2013)
Embellish Me Happy (April 2013 - Oct. 2013)

Guest Designer:
Back Porch Memories kit club (April 2013)
The Robin's Nest (Aug. 2013)

Current Design Teams:
Scrapbook Challenges ( Jan. 2013 -  )
Timeless Twine ( Jan. 2013 - Dec. 2013 )
Simple Sketches (Sept. 2013 - Feb. 2014)
Zappy Dots ( Sept. 2013 - )


Saturday, December 21, 2013

Elf Antics

 I can't believe Christmas is in four days. I am sure everyone is super busy getting the last minute things done but I am glad to see you took some time out to see the latest sketch reveal from Simple Sketches.
I stuck to the sketch for my page. I love the slit tilt and layers. I just changed the size of my photos. 
Supplies cardstock (The Paper Studio and American Crafts), pattern paper (Pretty Little Studio and Lily Bee Designs), flair (Studio Calico) doily (Studio Calico), sequins (Tree House Studio), stickers (American Crafts and Studio Calico), washi tape (Target)
This year I was the first time my family and I did the Elf on the Shelf. Every night I hid him and my parent and brother find it in the morning. Usually, my dad ends up re-hiding it or doing something to the scene I set up. My family like looking for it and plus, it gives me something to photograph on days I don't have anything for my Dec. Dail but so far I have other things.
Thanks for stopping by and hope on over to Simple Sketches to see the full reveal. Have a wonderful Christmas and God bless.

Sunday, December 15, 2013

Twine Farwell

Today is my last post as a design team member of this fabulous company. I would like to thank Stacy, Debbie and my twine sisters for the amazing and fast year.
Today's project is a cute Christmas gift bag that has a sequins filled tag and a tassel. Be sure to stop by the TT blog to see more details on the bag and tassel.
                                                         
Right now, let's focus on the tag. 
 To make this you will need:
Tag
Sequins
Sewing Machine
Thin clear plastic (I used a sleeve from a 4x6 photo album)
Low tack tape (washi or painters tape)
1. Add tape to back of the tag. Making sure it goes beyond the tag.
2. Add sequins to the center.
3. Place plastic on top. Make sure the tape sticks to it.
4. Carefully pick the tag up and sew the plastic to the tag. Make sure to don't catch any of the sequins in the stitches. 
5. Carefully, remove the tape. Trim away the excess plastic. 
It only took 5 easy steps to create this beautiful tag. 
Be sure to follow me to see my latest twine creations.
Twines I used.
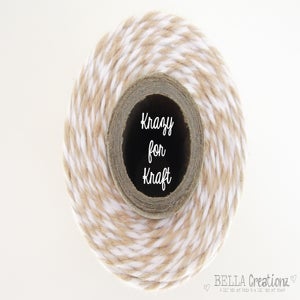
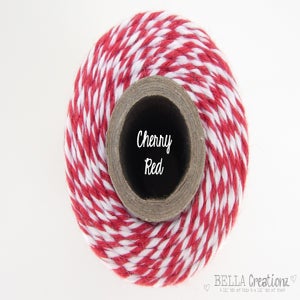
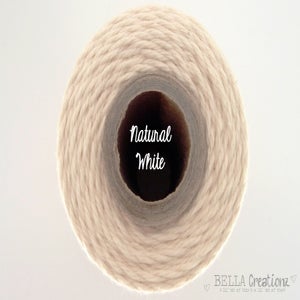
Image of Kraft Brown Bakers Twine ~ {Light Brown, Khaki, Flax Bakers Twine}Image of Cherry Red TIMELESS TWINE™Image of Natural Baker's Twine by Timeless Twine
Thanks for stopping by and have a twine filled day.

Saturday, December 7, 2013

It is a Party

This week I used some older birthday pics from Buster's birthdays for this Simple Sketches #15 sketch.It is a simple sketch and I love it. My favorite part is the large chevron so I knew I want to use that design element on my page. 

Supplies: cardstock (The Paper Studio), pattern paper (Fancy Pants Designs),stickers (American Crafts and Fancy Pants Designs), post it (K & Co.) die cuts (Basic Grey and 7 Gypsies), washi tape (Scotch), flair (Zappy Dots), twine (Timeless Twine), sequins and diy enamel dots.
I am head over heels in love with this page. It look so fun and happy that work great with birthday photos. I was saving this flair badge for a special page and this must have been it because it finished the bottom cluster perfectly. I have a little confession to make. When I finished this page I realized that the stars were upside down. I guess you could also say the stars are going diagonal too. I am saying the later so I don't think I made a big mistake.

Monday, December 2, 2013

Sketch Lovers Blog Hop


Welcome to the SG Blog Hop for December, if this is your first stop, you might like to start at the Scrapbook Generation blog and then hop through each link.
For my page I went with a single page sketch from my favorite sketchbook Sketches for Scrapbooking one-page sketches Vol. 2). I ended up using some old Christmas photos of my late Jido (aka Grandpa). I used a paper that had a big image for the base because I was keeping everything else on the other side. I love how this page came out and that I was able to add layers and clusters with the sketch. 
Supplies: cardstock (The Paper Studio), pattern paper (My Minds Eye and Graphic 45), washi tape (Darice and 7 Gypsies), ink (Quick Quotes), tags (Bo Bunny), die-cuts (The Robin's Nest), twine (Timeless Twine), doily and sequins)
You can find the SG sketches in their books and as downloads in the SG store, and there is a free one every month in case you wanted to try it out.

Next on the hop is Cicily, leave a comment on each blog and one lucky commenter will receive a free sketch bundle of their choice from the store. The winner will be draw on December 9th, so you have one week to leave a comment.

In case you get lost at any point, here is the list all the blogs
Scrapbook Generation blog - http://scrapbookgeneration.blogspot.com/
Mandi - http://mjskraze.blogspot.com/ <<<<<<<< You Are HERE

Saturday, November 30, 2013

The Gift of a Gift Card Holder

 I can't believe it is that time of the year all ready and to help you with the gift wrapping all month long the twine-istas are going to share with you fun and creative ways to jazz up packages.
Both of my holders are made out of felt, decorated with twine and odds & ends. 
The first one I and going to share with you is a little time consuming since I did the blanket stitch by hand. I created a little bag with felt and decorated until my heart was content.
 I covered the entire back of the doily with adhesive before I stuck it on. Then I add some glitter  and brush of the excess that didn't stick in the doily holes. For the closure I used brads and wrapped twine around them.
 I stung some twine through the blanket stitch to create the handle.

For a faster and just as cute holder I wrapped felt around the card and tied it with cherry red twine. I add a couple bells as an added cute factor.
Hope this help you with those pesky gift cards that we all don't want to give in a plain envelope.
Items I used NaturalCherry Red, Olive Green twines and a doily.
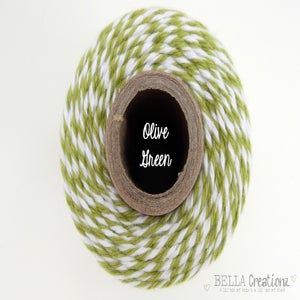
Image of Natural Baker's Twine by Timeless TwineImage of Cherry Red TIMELESS TWINE™Image of Olive Green Timeless Twine™4" Paper Lace Doilies - Set of 100 - "FREE SHIPPING"
Today is a perfect time to stock up for the holiday. The sale ends tonight at  11:59 EST. 

Thanks for stopping by and be sure to stop by my blog for more close-ups.

Saturday, November 23, 2013

Christmas Company

Today, is a special day. It is not only a Simple Sketches reveal it is also my Dad's birthday today.  Happy Birthday Dad.
This week's sketch was a great one because it was an easy one to accomplish that still allowed me to add my touches.  

Supplies: cardstock (The PAper Studio), pattern paper (My Mind's Eye, Simple Stories) stickers (American Crafts, Simple Stories and My Mind's Eye)Flair (Zappy Dots), die cuts (7 Gypsies and Pink Paislee), rub-ons (The Paper Company), washi tape (Target), mist (Ranger), doily and diy enamel dots
This page was super fun to create. I use something I was going to toss on this page. The item was the rub-ons used on the photos. I have a hate/hate relationship with these because they usually don't stick but this day they work.
I also used a Zapp Dot flair badge on this page. I love how this looks on the page. If I didn't add that to that spot it would have looked unfinished and boring.
Thanks for stopping by and have a great day.
God Bless.

Wednesday, November 20, 2013

A Coke Break

Since I had a hop at the start of the week I couldn't share with you my newest layout using the #371 sketch at Scrapbook Challenges
This page came together super fast. I think it only took me an hour. 
Supplies: cardstock (The Paper Studio), pattern paper (Crate Paper) ribbon (Basic Grey), flair (Zappy Dots), stickers (American Crafts and Pebbles Inc.) doily, chipboard, modeling paste, mask (Studio Calico), mist (Heidi Swapp),punch (Fiskars),washi tape (Scotch tape) staples and diy enamel dots.
I am in love with this page. I had such a fun feel for these vintage beach photos of my mom and her family. I noticed Coke bottles in all the photos it inspired me for the title.


Monday, November 18, 2013

Autumn Blog Hop

Welcome to your first stop of the Autumn Blog Hop. Some of my online friends got together to share some Autumn inspired cards, layouts and altered projects.  The projects I planned on doing was banner but I decided on doing a canvas after I talked to Megan. Thanks girl, for the great idea. 
The photo I used on here was taken when I was walking Buster in Sept. Such a pretty scene for a very short walk from my house. 
Supplies: pattern paper (Echo Park), fabric (Die Cuts With A View), ribbon (Basic Grey), pom-pom trim, jumbo ric-rac, chipboard (Um Wow Studios and ?), stickers (Basic Grey), twine (Timeless Twine), charms (Karen Foster), brads (?), washi tape (?, Target, and Darice), binder sleeve (Up & Up), marker (Bic),modelling paste (Liquitex), mask (The Crafter's Companion) and heat tool
I ended up using adhesive fabric to cover the canvas. I the applied my paste. I used my heating tool to puff up the paste. (Note: fabric shrinks if you get the heating tool to close. Found out until it was too late.)
To cover up the shrink fabric I added wahi, ric-rac and twine to the edges.
Love how this group looks. I matted paper on more of the fabric.
I never know how to finish of the canvas edges so I just cover it in washi.
Mandi - mjskraze.blogspot.com/  <<<<< You are here
Amanda - www.lovejoypaper.com
Megan -  creativitybymeg.blogspot.com/ 
Robyn - cozienookhomestead.wordpress.com 
Devra - www.mycreativeview.blogspot.com/
Laurie -  tulip-scrapper.blogspot.com/
Cassie - allsmilesandsunshine.blogspot.com/
C
hristy - myscrapbookevolution.blogspot.com/
Now onto Amanda' blog to see what she has created that is Autumn inspired.   If you get lost on your way come back here to get back on track.
Thanks for hopping.