Monday, July 20, 2020

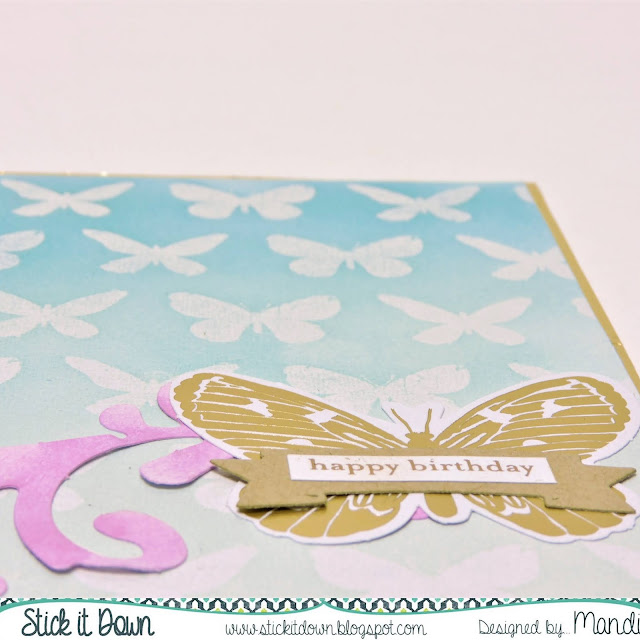
Butterfly Birthday @ Stick It Down

   Happy Monday, time to get back to the old grindstone, or if you are like me your weekend was filled with business work. Today, I will be sharing my take in this month's sketch from Stick It Down. 
   When I first saw this sketch I knew that I wanted to use the watercolor resist pad that I got for Christmas. 
 Supplies: cardstock (Cardstock Warehouse), pattern paper (Target), die cuts (Target), ink (Altenew), manual die (Spellbinders), sticker (Pebbles Inc.), blending brushes (Picket Fence)

   Here is a closer look. I love using the blending brushes on this card it allowed me to create a nice ombre effect. 

   The butterfly and swirl die cuts also came from the same watercolor paper pad as the resist paper. 
   
   This month's prize for one lucky crafter in this Pinkfresh Studio stamp. To enter all you have to do is submit an entry of a card or layout using one of this month's Stick It Down sketches. 

Friday, July 17, 2020

Christmas Table

   Hello everyone, today I will be sharing Christmas project since it is Christmas in July. Today I will be sharing how-to create simple place setting cards.
   Step 1. Fold cardstock in half. Tape the die the cardstock making sure the top of the die overhang the fold. Run it through the die cutter, this will create the card base. 
    Step 2. Die-cut next smaller size in the nesting die set.  Also, at this time die cut the Sizzix Tim Holtz Funky Floral #3  flower. For the flower center, I used a sequin. Adhere everything to the place card. 
 Step 3. Type names on cardstock, trim strips, and tuck it under the flower. To make the cards stand up straight just trim off the bottom to create a flat edge. 
Dies R Us Product Used:

Don't forget to come to join in the fun at the Dies R Us Challenge Blog.  There's a new challenge theme offered on the 1st and 15th of each month and one lucky randomly drawn winner will receive a gift voucher prize to the Dies R Us Store.  For your convenience, all the important Dies R Us links are provided below.


Click below for:
FRIENDS OF DIES R US PINTEREST PAGE

Thanks for stopping by!

Friday, July 10, 2020

How To- Spinner Card

 Today's card that I will be sharing with you is a spinner card. This type of card is perfect to showcase a die-cut. 

   The first thing I did was use temporary adhesive to hold the cardstock onto the card base. Tape the die in place and run it through your machine. You might have to add a shim to the die-cut plate sandwich to be able to cut through both layers. Remove the paper from the card base. 
  
 Die-cut the layered Jeanine's Art Classic Butterflies twice but make sure to die cut the image once on with the right side of the paper facing up and once when it is facing down. This ensures the when glueing the die cuts backs together that it lines up perfectly. 

   Now glue a piece of string to the center of the card base. Adhere to the die-cut pattern paper to the base, making sure to match the negative die-cut space. 
  
 Last, this is to add the die-cut. Once it has dried spin the die-cuts around a few times. While holding the wound up die-cut close the card and slide it into the envelope. When the card is removed from the envelope and open the die-cut will spin. 

Here is a little video of the card spinning and how to prepare it for the envelope. 

Dies R Us Product Used:

Don't forget to come to join in the fun at the Dies R Us Challenge Blog.  There's a new challenge theme offered on the 1st and 15th of each month and one lucky randomly drawn winner will receive a gift voucher prize to the Dies R Us Store.  For your convenience, all the important Dies R Us links are provided below.


Click below for:
FRIENDS OF DIES R US PINTEREST PAGE

Thanks for stopping by!